Workspace Overview
Understand the transcript editor layout so you can work faster and with confidence.
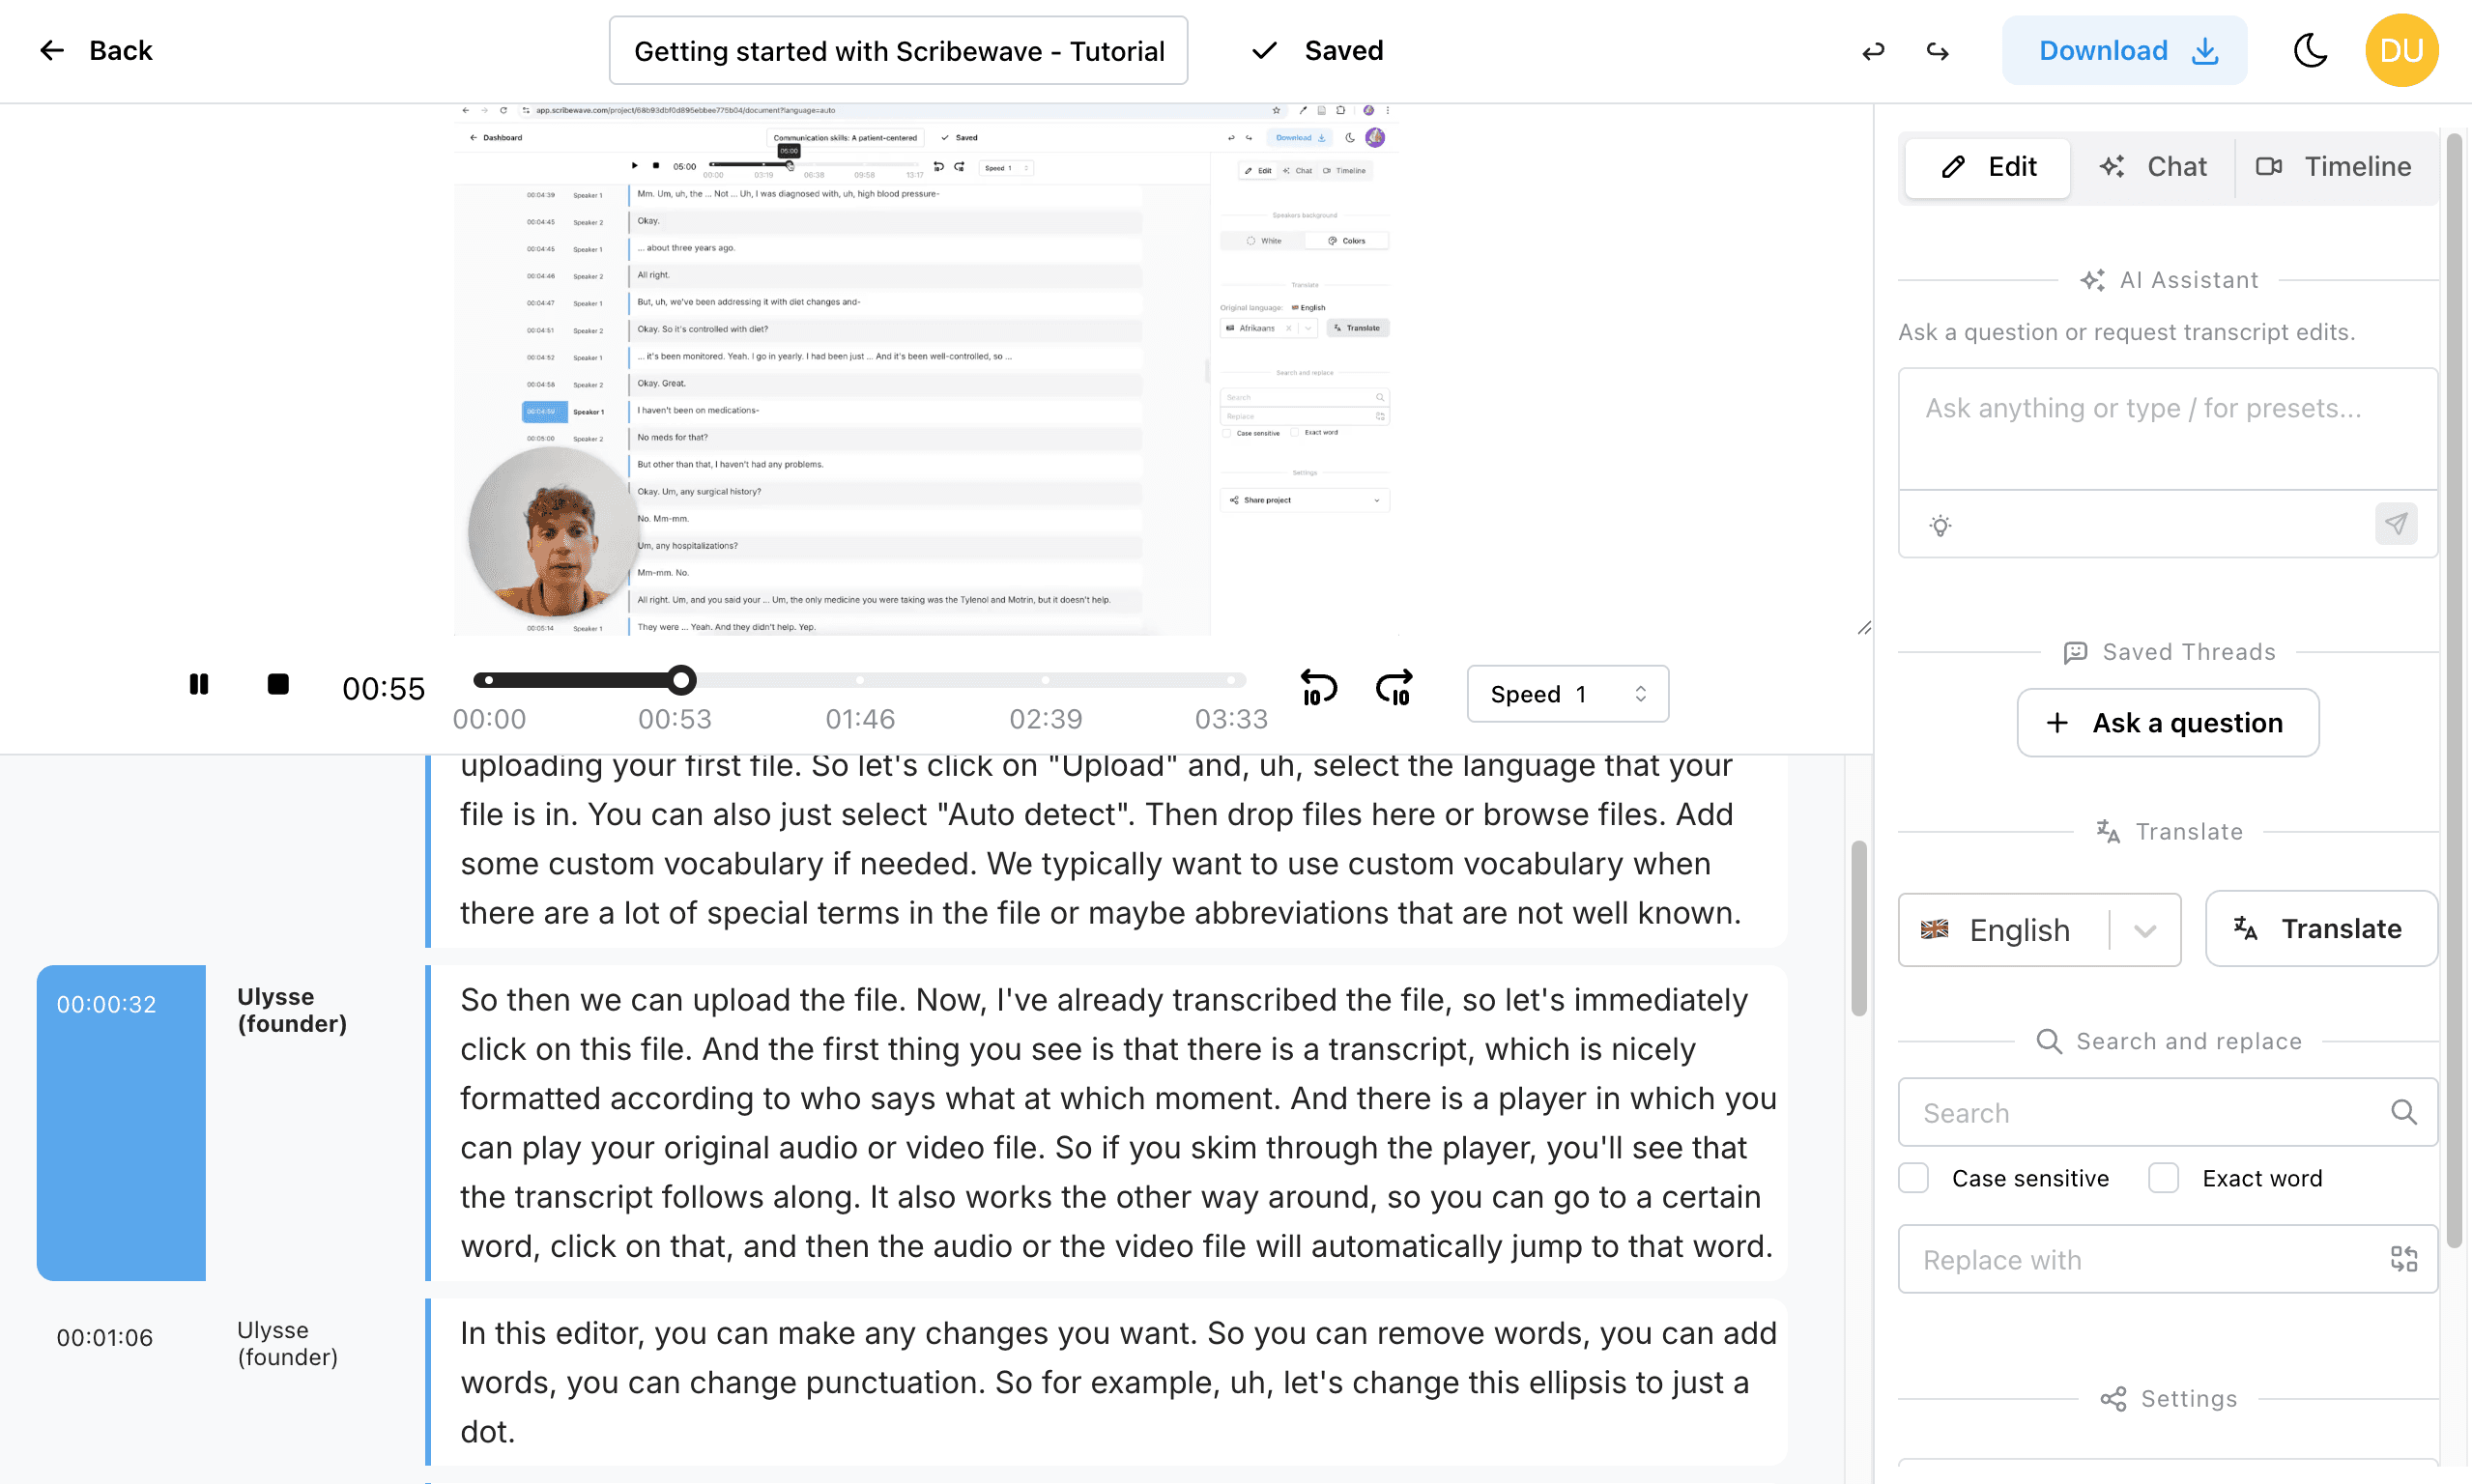
When you open the editor, the workspace is organized into a few main sections: the header, the playback controls, the transcript canvas, and the right sidebar.
1. The Header
At the very top of the editor is the header area. Here you can:
- Rename your project directly.
- View the current saving status.
- Use the undo and redo buttons to revert or reapply editing actions.
- Access the Download button to export your final transcript.

2. Playback Controls
Directly below the header is the play bar area.
- If you uploaded an audio file, you will see an audio player.
- If you uploaded a video file, you will see a video player.
Tip: You can resize the video preview by dragging the control in the bottom right corner of the video player section.
3. The Transcript Canvas
Below the playback controls is the main transcript area itself.
The transcript is automatically separated into different paragraphs and speakers, and every section has its own time code.
- Jump to a section: Click anywhere on a section's text to jump the playback directly to that time code.
- Jump to a word: Double-click on a specific word to go exactly to that word in time.
4. The Right Sidebar
The right panel contains various tools and controls to help you edit efficiently. These are mostly found in the Edit tab:
- AI Editor: You can chat with the AI assistant to make corrections. For example, you can ask it to highlight or remove all filler words from your transcript, or ask it to summarize or analyze your text.
- Translate: Use this function to automatically translate your entire transcript into a different language.
- Search and Replace: This is very handy if a specific word or name has been transcribed incorrectly. You can search for the wrong spelling and replace it with the correct one across the entire transcript.
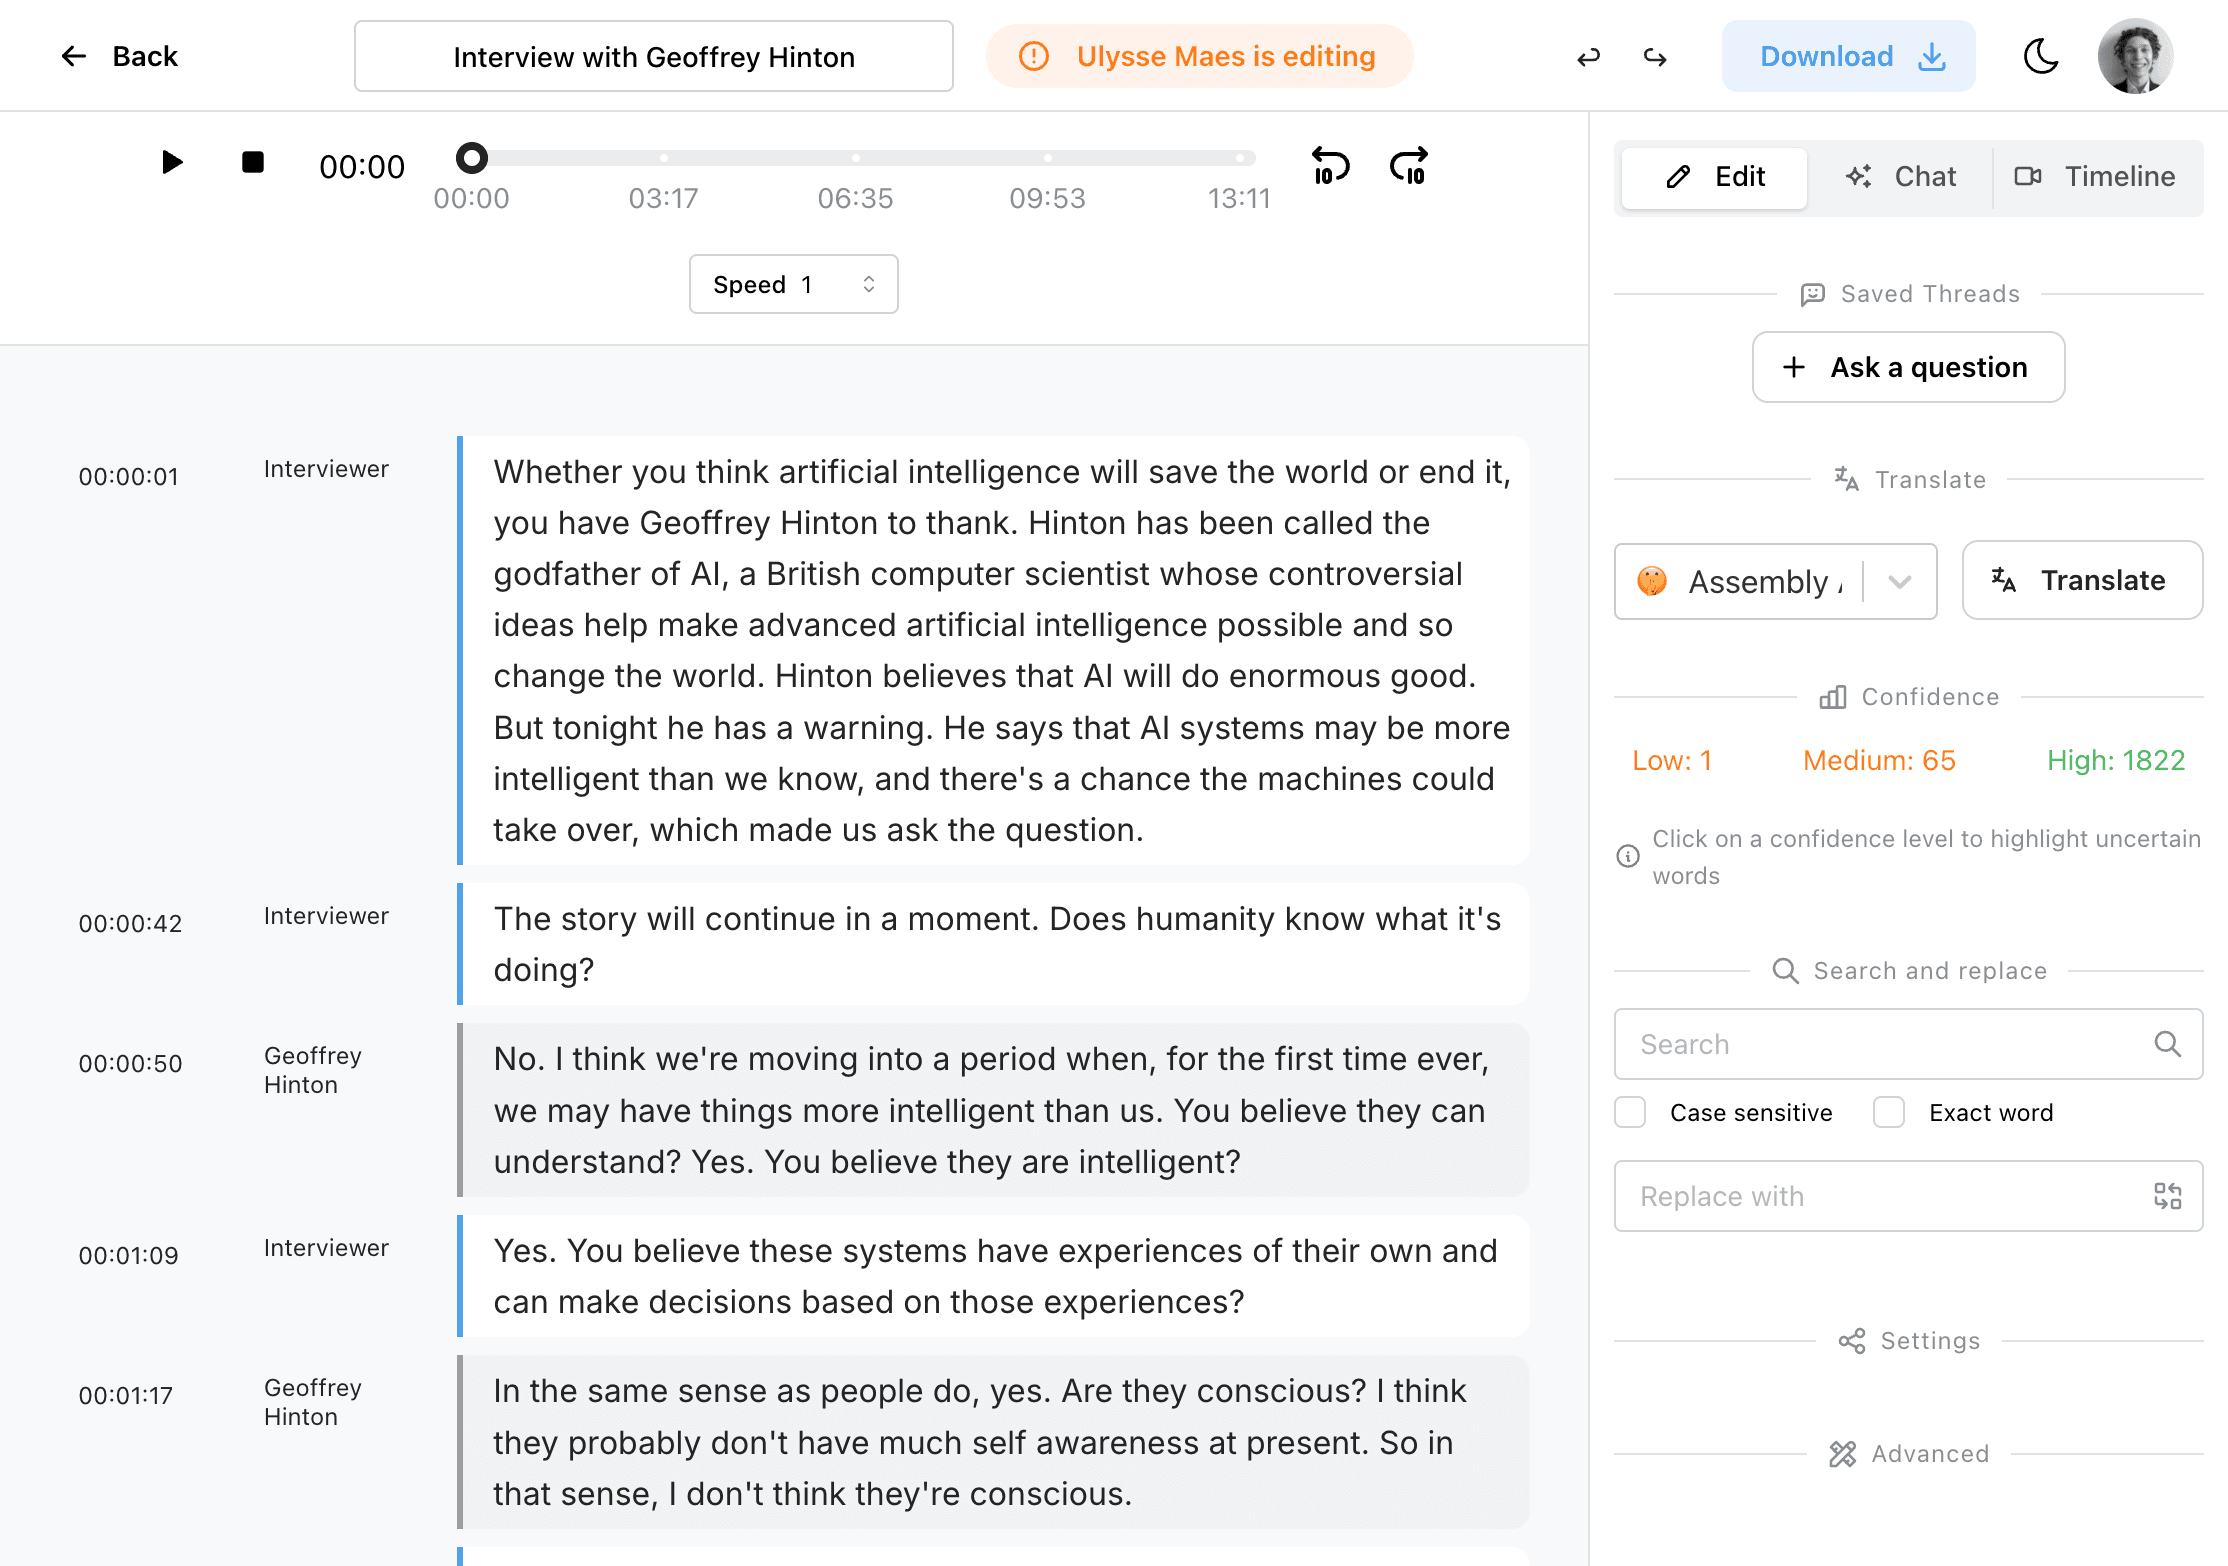
Tab Modes
Scribewave supports different editor tabs to suit your workflow:
- Edit tab: The core area where you manage the right sidebar actions (AI edits, translate, search & replace).
- Chat tab: Allows you to explore the AI assistant a bit more in-depth and have a conversation regarding your transcript.
- Timeline tab: Traditionally used for creating subtitles.
Need specialized subtitles?
If your main goal is creating and styling subtitles, you can use the Timeline tab. However, we highly recommend checking out our specialized tool for this: subtitle.ai, which is also a service by Scribewave built specifically for advanced subtitle creation.
Continue with Edit and navigate for daily transcript work.